materials:
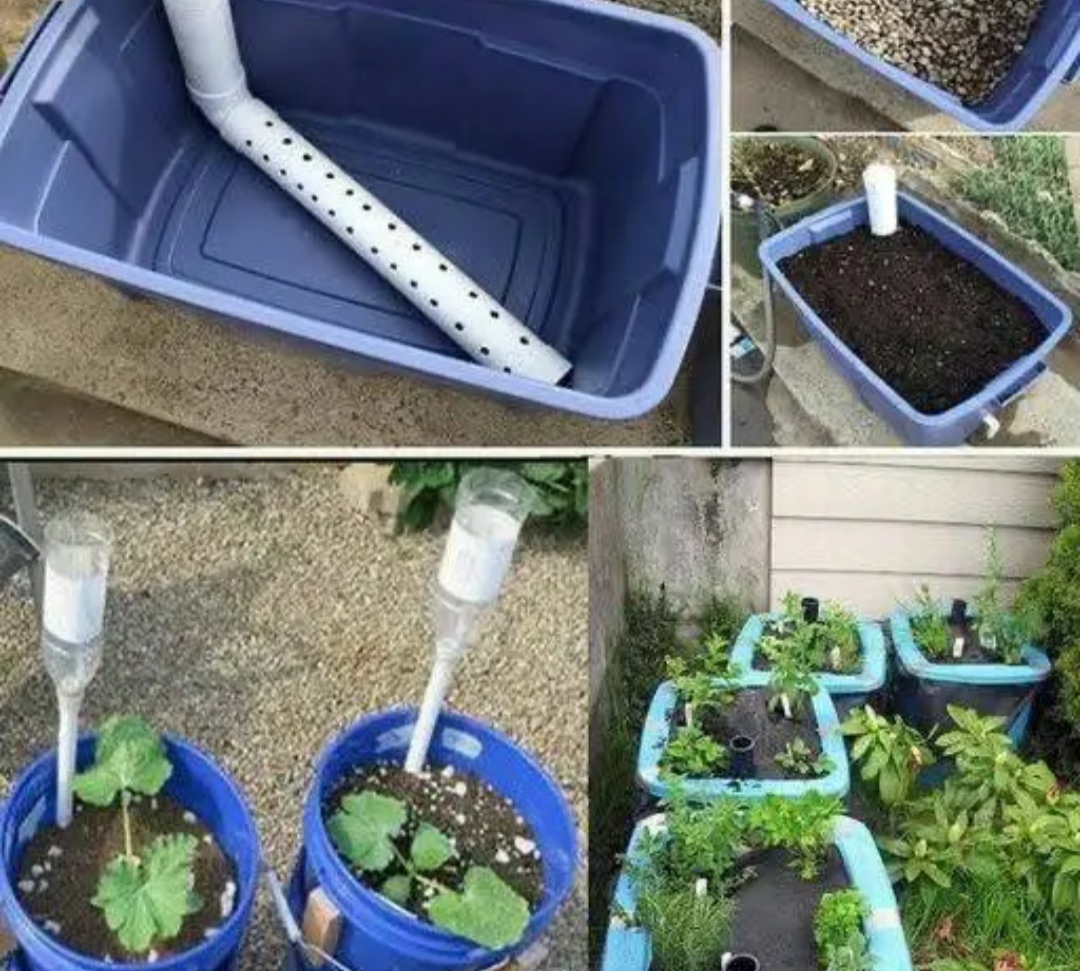
Plastic storage containers (preferably with lids)PVC pipe or tubingDrainage gravel or pebblesPotting soilWicking material (such as cotton rope or felt fabric)Water reservoir (could be a second container or a section within the same container)Drill with drill bitsUtility knife or scissorsStep 1: Prepare the ContainersStart by selecting your plastic storage containers. These will serve as the main vessels for your self-watering system. Drill holes in the bottom of one container for drainage, ensuring excess water can escape. The other container will become the water reservoir, so no drainage holes are needed in this one.
Step 2: Create the Wicking SystemCut a piece of PVC pipe or tubing to fit the height of your containers. This will serve as the wicking mechanism, allowing water to travel from the reservoir to the soil. Next, cut a length of wicking material (cotton rope or felt fabric) and thread it through the PVC pipe. Leave enough length to reach the bottom of the soil container and extend into the water reservoir.
Step 3: Assemble the Container LayersPlace a layer of drainage gravel or pebbles at the bottom of the soil container. This helps prevent waterlogging and provides aeration for the roots. Insert the PVC wicking system into the center of the container, ensuring it reaches the bottom. Fill the container with potting soil, leaving enough space at the top for planting.
Step 4: Set Up the Water ReservoirPlace the second container (the one without drainage holes) beneath the soil container. This will act as the water reservoir. Fill it with water, making sure the bottom of the wicking material is submerged. You may opt to install a water level indicator to monitor the reservoir’s water level easily.
Step 5: Plant and MaintainWith your self-watering container assembled, it’s time to plant your desired greenery. Cho