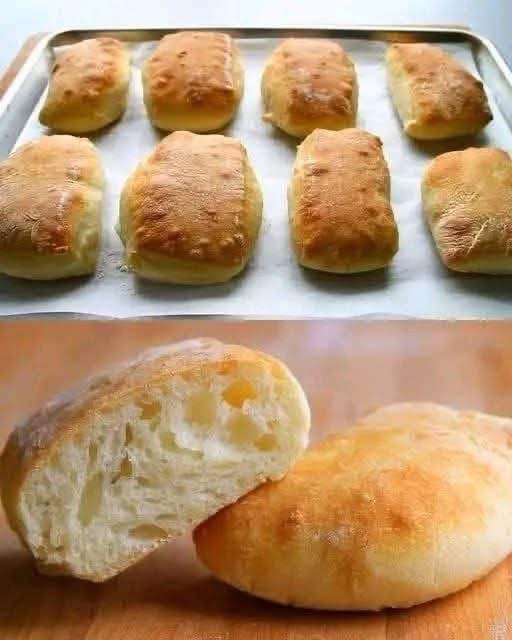
Absolutely! Ciabatta is famous for its crisp crust and soft, holey interior. While it seems fancy, it’s surprisingly simple and affordable to make at home with just a few basic ingredients.
This recipe uses a “poolish” (a simple pre-ferment) which is the secret to achieving that classic ciabatta flavor and texture without any special equipment.
Simple & Affordable Homemade Ciabatta Bread
Yields: 2 loaves
Cost: Very low (Flour, Water, Yeast, Salt)
Time: About 18-24 hours total (mostly hands-off waiting)
Ingredients
For the Poolish (Starter):
· 1 cup (120g) All-Purpose or Bread Flour
· ½ cup + 2 tbsp (150g) Cool Water
· A pinch of Instant or Active Dry Yeast (less than ¼ tsp)
For the Final Dough:
· 2 cups (240g) All-Purpose or Bread Flour
· ¾ cup (180g) Warm Water
· 1 ½ tsp (9g) Fine Sea Salt or Kosher Salt
· ½ tsp (2g) Instant or Active Dry Yeast
· All of the prepared Poolish
Equipment You’ll Need
· A large bowl
· A wooden spoon or spatula
· Plastic wrap or a damp kitchen towel
· A baking sheet
· Parchment paper
Step-by-Step Instructions
Day 1: Evening (5 minutes) – Make the Poolish
- Mix: In a medium bowl, whisk the flour, water, and pinch of yeast for the poolish until it forms a smooth, thick, batter-like consistency. There should be no dry flour spots.
- Rest: Cover the bowl tightly with plastic wrap and let it sit at room temperature for 12-16 hours (overnight is perfect).
Day 2: Morning & Baking
Step 1: Mix the Dough (10 minutes)
- Check your Poolish: It should be bubbly, puffy, and have a slightly domed surface. It will smell yeasty and slightly sweet.
- Combine: In a large bowl, add the warm water and the poolish. Use your spatula or whisk to break up the poolish and mix it into the water until soupy.
- Add Dry Ingredients: Add the remaining 2 cups of flour, salt, and the ½ tsp of yeast. Stir with a spatula or wooden spoon until a shaggy, sticky dough forms. It will be very wet and messy—this is perfect! Do not add more flour.
Step 2: Bulk Fermentation & Folds (2.5 hours, hands-on time: 10 min)
- First Rest: Cover the bowl and let the dough rest for 30 minutes.
- First Fold: With a wet hand or a wet spatula, reach under one side of the dough, stretch it up, and fold it over the center. Repeat this stretching and folding three more times (North, South, East, West). Cover again.
- Repeat: Let the dough rest for another 30 minutes, then repeat the stretching and folding process. Do this 3-4 times total, every 30 minutes. You’ll feel the dough become stronger and smoother with each fold.
Step 3: Shape & Final Proof (1.5 hours)
- Prepare Pan: Line a baking sheet with parchment paper and dust it generously with flour.
- Shape: Heavily flour your work surface and your hands. Gently scrape the dough out onto the surface. It will be loose. Dust the top of the dough with flour.
- Divide: Using a dough scraper or a sharp knife, gently cut the dough in half. You can shape them into rough rectangles. Don’t knead or degas it—you want to keep those precious air bubbles!
- Transfer: Carefully lift each piece of dough onto the prepared baking sheet, placing them seam-side down. Dust the tops with a little more flour.
- Final Rise: Cover loosely with a well-floured kitchen towel or plastic wrap. Let them rise for 1 to 1.5 hours, until puffy and doubled in size.
Step 4: Bake (25 minutes)
- Preheat: While the dough is proofing, place a baking sheet (or a pizza stone) on the middle rack and preheat your oven to 475°F (245°C).
- Bake: Once the loaves are ready, carefully slide the parchment paper with the loaves directly onto the preheated baking sheet (or stone). This gives the bottom an instant blast of heat for a better crust.
- Create Steam (Optional but recommended): Quickly spray the inside of the oven with water 5-6 times right after you put the bread in. The steam helps create a crisp, shiny crust.
- Bake for 20-25 minutes until the crust is a deep, golden brown and the loaves sound hollow when tapped on the bottom.
- Cool: This is the hardest part! Let the ciabatta cool completely on a wire rack for at least 1 hour before slicing. The inside is still cooking, and cutting it warm will make it gummy.
Why This Recipe Works & Pro Tips
· The Poolish is the Key: This pre-ferment develops the gluten and flavor with very little yeast, giving you that classic “artisan” taste and open crumb.
· Wet Dough = Holey Bread: Ciabatta dough is notoriously wet. Resist the urge to add more flour! The folds in the bowl help build strength without making it dense.
· Handling the Dough: Use a light touch and plenty of flour on your hands and work surface to handle the sticky dough during shaping.
· The Steam Trick: The steam in the first few minutes of baking allows the crust to expand before setting, resulting in a lighter, crispier loaf.
Enjoy the incredible smell and the satisfaction of baking your own beautiful, affordable ciabatta! It’s perfect for sandwiches, dipping in olive oil, or serving with soup.