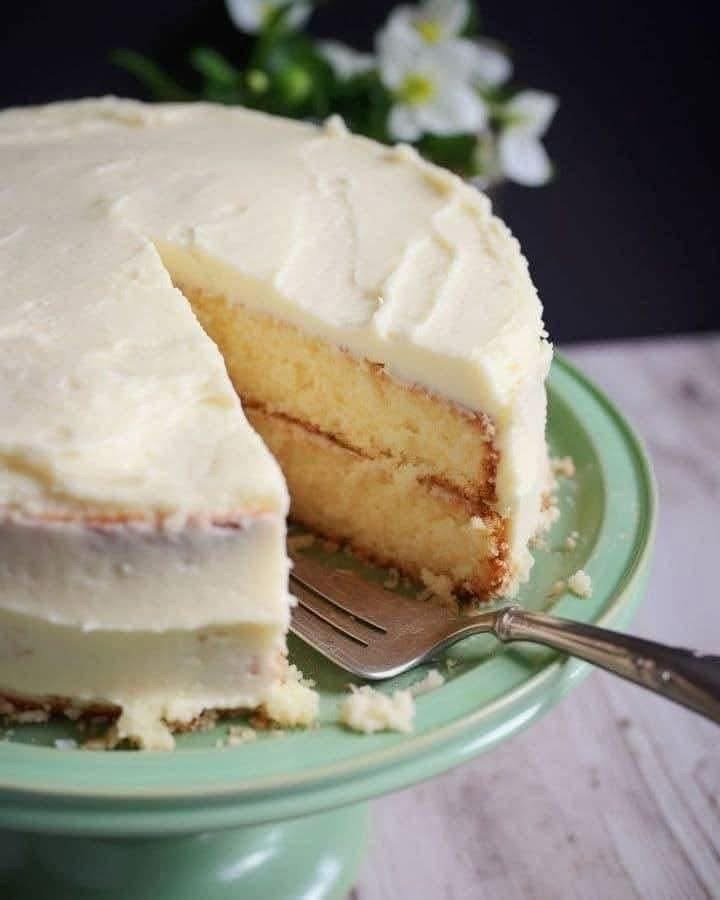
Of course! White Velvet Cake is a stunning and delicious variation of Red Velvet. It’s known for its exceptionally soft, fine, and velvety crumb, pure white color, and a subtle, rich flavor from butter and a touch of almond.
Unlike Red Velvet, it doesn’t rely on cocoa for its character. The “velvet” texture traditionally came from a chemical reaction between acidic ingredients (like buttermilk) and baking soda, but this version uses both baking powder and soda for a perfect rise and tender bite.
Here is a classic, highly reliable recipe for a beautiful White Velvet Cake.
The Ultimate White Velvet Cake
This recipe yields a tall, elegant 3-layer 8-inch cake or a 2-layer 9-inch cake.
Ingredients
For the Cake:
· 3 cups (345g) cake flour, sifted (essential for a tender crumb)
· 2 cups (400g) granulated sugar
· 1 tablespoon baking powder
· ½ teaspoon baking soda
· 1 teaspoon salt
· 1 cup (2 sticks / 226g) unsalted butter, softened to room temperature
· 4 large egg whites, at room temperature
· 1 cup (240ml) full-fat buttermilk, at room temperature
· ⅓ cup (80ml) vegetable or canola oil
· 1 tablespoon pure vanilla extract
· 1 teaspoon almond extract (optional, but highly recommended for flavor depth)
For the Frosting (Classic Ermine Frosting):
· This is the traditional frosting for Velvet cakes. It’s less sweet than American buttercream and has a wonderfully silky, almost whipped cream-like texture that pairs perfectly.
· 1 ¼ cups (250g) granulated sugar
· 5 tablespoons (43g) all-purpose flour
· 1 cup (240ml) whole milk
· 1 cup (2 sticks / 226g) unsalted butter, softened but cool
· 1 teaspoon pure vanilla extract
· Pinch of salt
(Alternatively, you can use Swiss Meringue Buttercream or American Buttercream if you prefer.)
Step-by-Step Instructions
Part 1: Making the White Velvet Cake
- Prepare: Preheat your oven to 350°F (175°C). Grease and line the bottoms of your cake pans with parchment paper. This is crucial for easy release.
- Combine Dry Ingredients: In a medium bowl, whisk together the sifted cake flour, sugar, baking powder, baking soda, and salt. Set aside.
- Combine Wet Ingredients: In a separate bowl or large measuring cup, whisk together the egg whites, buttermilk, oil, vanilla extract, and almond extract until just combined.
- Cream the Butter: In the bowl of a stand mixer fitted with a paddle attachment (or with a hand mixer), beat the softened butter on medium-high speed until smooth and creamy, about 1 minute.
- Add Dry to Butter: With the mixer on low speed, gradually add the dry ingredients to the butter. Mix until the mixture resembles moist sand. This step, called the “reverse creaming” method, helps prevent over-mixing and ensures a fine, velvety crumb. Scrape down the sides of the bowl as needed.
- Add Wet Ingredients: With the mixer still on low, slowly pour in the wet ingredient mixture. Increase the speed to medium and beat for about 60-90 seconds only, until the batter is smooth and well-combined. Do not over-mix.
- Bake: Divide the batter evenly between the prepared pans. Bake for 25-30 minutes, or until a wooden skewer inserted into the center comes out clean or with a few moist crumbs.
- Cool: Let the cakes cool in their pans on a wire rack for 15-20 minutes. Then, carefully invert them onto the rack, remove the parchment paper, and allow them to cool completely before frosting.
Part 2: Making the Ermine Frosting
- Cook the Paste: In a medium saucepan, whisk the flour and sugar together. Gradually whisk in the milk until smooth. Cook over medium heat, whisking constantly, until the mixture thickens into a very thick paste-like pudding (this can take 5-8 minutes).
- Cool Completely: Remove from heat and scrape the mixture into a clean bowl. Press plastic wrap directly onto the surface to prevent a skin from forming. Let it cool to room temperature. This is critical; if it’s warm, it will melt the butter.
- Whip the Butter: In a stand mixer with the paddle or whisk attachment, beat the softened butter on medium-high speed until it is light, pale, and fluffy (about 5 minutes).
- Combine: With the mixer running on low, gradually add the completely cooled flour-milk mixture, one tablespoon at a time. Once all is added, increase the speed to medium-high and whip for a full 5-7 minutes, until the frosting is light, fluffy, and no longer tastes of raw flour. It will resemble the texture of whipped cream cheese.
- Flavor: Beat in the vanilla extract and salt.
Assembly & Pro Tips for Success
· Level the Cakes: If your cake layers have domed tops, use a serrated knife to level them off for a stable, professional-looking cake.
· Crumb Coat: Apply a thin layer of frosting (a “crumb coat”) over the entire cake. Chill for 15-20 minutes to set it. This will trap any loose crumbs.
· Final Coat: Apply a final, thick layer of frosting and decorate as desired.
Why These Ingredients & Steps Matter:
· Cake Flour: Lower protein content than all-purpose flour = a more tender, delicate crumb.
· Room Temperature Ingredients: Allows for better emulsification and a smoother, more uniform batter, which leads to a better rise.
· Oil + Butter: Butter provides fantastic flavor, while oil ensures the cake stays incredibly moist.
· Reverse Creaming: Coating the flour in fat first inhibits gluten development, which is the key to that signature “velvet” texture.
· Don’t Over-mix: Over-mixing develops gluten, leading to a tough, dense cake.
Enjoy your breathtakingly beautiful and delicious White Velvet Cake! It’s perfect for weddings, birthdays, or any special occasion.