Of course! Garlic Butter Seared Scallops are the epitome of a luxurious yet deceptively simple dish. When done right, they are tender, sweet, and enveloped in a rich, aromatic garlic butter sauce.
Here is a detailed guide to achieving perfectly seared scallops with a gorgeous golden crust every time.
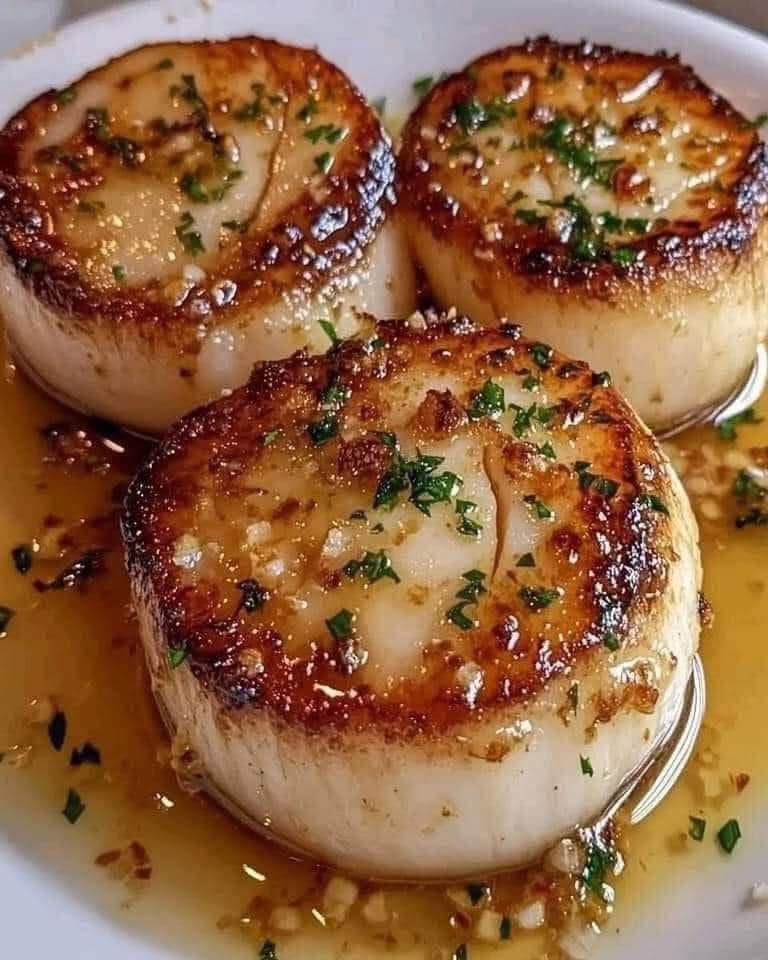
The Secret to Perfect Garlic Butter Seared Scallops
The goal is a firm, caramelized crust that gives way to a tender, almost creamy interior. The key is high heat, dry scallops, and not moving them until a crust has formed.
Recipe: Perfect Garlic Butter Seared Scallops
This recipe serves 2 as a main course or 4 as an appetizer.
Ingredients
· 1 lb (450g) Dry Sea Scallops (about 10-12 large “U10” or “U15” scallops) – “Dry” is critical!
· 2 tablespoons unsalted butter, divided
· 1 tablespoon olive oil or avocado oil
· 3-4 cloves garlic, finely minced
· 2 tablespoons fresh parsley, finely chopped
· 1 tablespoon fresh lemon juice (about ½ lemon)
· Salt and freshly ground black pepper
· Optional for sauce: 2 tablespoons dry white wine (like Sauvignon Blanc) or chicken broth.
Equipment
· 1 large stainless steel or cast iron skillet (Non-stick skis won’t give you the same crust)
· Tongs or a flexible spatula
· Paper towels
Instructions
Step 1: The Most Important Step – Prep Your Scallops
- Buy “Dry” Scallops: Ask your fishmonger for “dry-packed” scallops. Avoid “wet-packed” scallops, which are treated with a sodium solution that makes them exude water and prevents a proper sear.
- Remove the Side Muscle: Look for a small, tough tag of tissue on the side of each scallop (the “abductor muscle”). Pinch it and pull it off; it’s easy to remove.
- Pat DRY: Place the scallops on a stack of paper towels and pat them thoroughly dry on all sides. This is non-negotiable for a good sear. Season generously with salt and pepper just before cooking.
Step 2: Sear the Scallops
- Get the Pan Hot: Place your skillet over medium-high to high heat. Let it get very hot—you should see a slight wisp of smoke.
- Add Oil and Butter: Add the olive oil and 1 tablespoon of the butter to the hot skillet. Swirl to coat.
- Place Scallops: Carefully place the scallops in the pan, one by one, ensuring they aren’t touching. This ensures proper steaming and caramelization.
- DON’T TOUCH THEM: This is the hardest part! Resist the urge to move, poke, or press down on the scallops. Let them sear undisturbed for 1.5 to 2 minutes.
- Check for Crust: Peek underneath one. If it has a deep golden-brown crust, it’s ready to flip. If not, give it another 30 seconds.
- Flip: Using tongs, flip each scallop. They should release easily from the pan if a crust has formed. Sear on the second side for 1 to 1.5 minutes. They are done when they are just firm to the touch but still have a slight give in the center (like the fleshy part of your palm when you press it). Do not overcook.
Step 3: Create the Garlic Butter Sauce
- Remove Scallops: Immediately transfer the seared scallops to a warm plate.
- Lower Heat & Add Aromatics: Reduce the heat to low. Add the remaining 1 tablespoon of butter and the minced garlic to the same pan. Sauté for just 30-60 seconds until fragrant—do not let the garlic burn.
- Deglaze (Optional but recommended): Pour in the white wine or chicken broth. Use a whisk to scrape up all the delicious browned bits (the “fond”) from the bottom of the pan. Let it simmer and reduce by half, about 1 minute.
- Finish the Sauce: Turn off the heat. Stir in the fresh parsley and lemon juice.
Step 4: Serve Immediately
· Return the scallops and any accumulated juices to the pan, swirling them gently in the sauce to coat.
· Serve immediately, spooning the pan sauce over the top.
Serving Suggestions
· Over Pasta or Risotto: The garlic butter sauce is incredible tossed with pasta, or pooled under a creamy risotto.
· With Crusty Bread: Essential for sopping up every last drop of that sauce.
· On a Bed of Greens: Serve over a simple arugula salad or with roasted asparagus, green beans, or zucchini noodles.
Chef’s Notes & Tips for Success
· Why Dry Scallops? Wet scallops will steam in their own liquid, resulting in a gray, rubbery scallop with no sear. Dry scallops are a must.
· Room Temp is a Myth: Cooking scallops straight from the fridge helps achieve a better crust without overcooking the center.
· Don’t Crowd the Pan: Cook in batches if necessary. Overcrowding will drop the pan’s temperature and cause the scallops to steam.
· The “Press” Test: A perfectly cooked scallop will be opaque. The best test is touch; it should feel like pressing the muscle between your thumb and forefinger when your hand is relaxed, not tense.
· Butter Burn: We start with a mix of oil and butter because butter burns at high heat. The oil raises the smoke point, allowing us to get a good sear without burning the butter.
Enjoy your restaurant-quality, incredibly delicious Garlic Butter Seared Scallops