Of course! You’re describing a classic, easy, and incredibly delicious dessert that goes by many names, like “Lazy Daisy Pudding,” “Berry Cream Delight,” or a “No-Bake Fruit and Cream Trifle.” It’s made by layering creamy filling, fruit, and biscuits (like cookies or graham crackers).
Here is a fantastic and versatile recipe for a No-Bake Layered Berry & Cream Dessert.
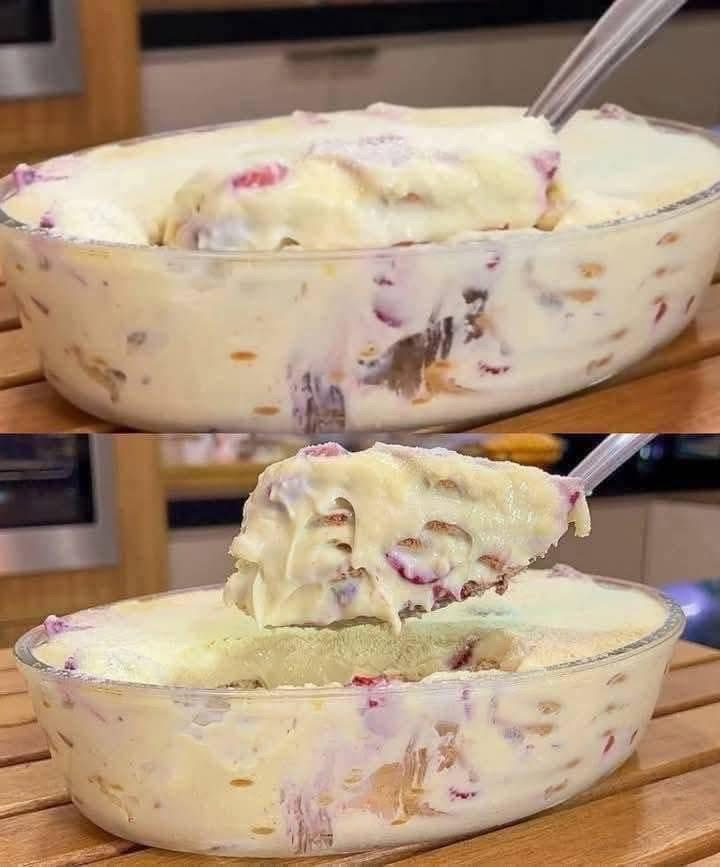
No-Bake Layered Berry & Cream Dessert
This dessert is light, refreshing, and perfect for summer. The biscuits soften into a cake-like layer, making it similar to a trifle but easier to assemble.
Prep Time: 20 minutes
Chill Time: 4+ hours (best overnight)
Serves: 9-12
Ingredients
For the Cream Layer:
· 1 (8 oz) block cream cheese, softened to room temperature
· 1 cup powdered sugar
· 1 teaspoon vanilla extract
· 1 (8 oz) tub frozen whipped topping (like Cool Whip), thawed – or 2 cups of freshly whipped heavy cream
For the Fruit Layer:
· 3-4 cups of fresh mixed berries (strawberries-sliced, blueberries, raspberries, blackberries)
· Alternative: 2 (15 oz) cans of fruit pie filling (cherry, blueberry, or peach)
For the Biscuit/Cookie Layer:
· 1 (14-16 oz) package of “tea biscuits” or “petit beurre” biscuits, or 1 sleeve of graham crackers
· Optional: ¼ cup of melted butter (if you want a more solid, cheesecake-like crust)
For Garnish (optional):
· Additional berries or mint leaves
Instructions
- Prepare the Pan: Lightly grease a 9×13-inch baking dish or a similar-sized trifle bowl.
- Make the Cream Cheese Layer:
· In a large bowl, use an electric mixer to beat the softened cream cheese until it’s smooth and creamy.
· Add the powdered sugar and vanilla extract, and beat again until fully combined and smooth.
· Using a spatula, gently fold in the thawed whipped topping (or your freshly whipped cream) until no white streaks remain. Set aside. - Prepare the Biscuits:
· If using a 9×13 dish: If you used melted butter, you can press a single layer of biscuits into the bottom to form a crust. However, the classic “no-bake” method is to simply lay the biscuits in a single, tight layer at the bottom of the dish, breaking them to fit as needed.
· If using a trifle bowl: You will be creating vertical layers. Start by placing a layer of biscuits to cover the bottom. - Assemble the First Layers:
· Spread half of the cream cheese mixture evenly over the layer of biscuits.
· Scatter half of your fresh berries (or spread one can of pie filling) over the cream layer. - Repeat the Layers:
· Place another layer of biscuits on top of the fruit.
· Spread the remaining cream cheese mixture over the biscuits.
· Top with the remaining berries or pie filling. - Chill:
· Cover the dessert tightly with plastic wrap and refrigerate for at least 4 hours, but ideally overnight. This is the most crucial step! It allows the biscuits to soften and absorb moisture from the cream and fruit, transforming into a soft, cake-like texture. - Serve: Just before serving, garnish with extra berries or mint. Scoop or slice and enjoy!
Variations & Pro Tips
· Different Fruits: This is incredibly versatile. Use sliced peaches, mandarin oranges, or even crushed pineapple (make sure to drain canned fruit well).
· Different “Biscuits”:
· Graham Crackers: A very common and delicious choice.
· Vanilla Wafers: Adds a lovely buttery flavor.
· Ladyfingers: Will make it taste like a no-bake tiramisu.
· Lighter Version: Use Neufchâtel (low-fat cream cheese) and sugar-free whipped topping.
· Don’t Skip the Chill: The dessert will be crunchy and separated if you serve it too soon. The long chill is what makes it magical.
· For a Parfait: Layer the ingredients in individual glasses for a beautiful, pre-portioned dessert.
This dessert is a guaranteed crowd-pleaser and could not be simpler to make. Enjoy your beautiful and delicious layered creation