Of course! Fried Potatoes and Onions is a quintessential comfort food side dish. It’s simple, humble, and incredibly satisfying. The key is getting the potatoes crispy on the outside and tender on the inside, with the onions soft and caramelized.
Here’s a classic stovetop method that delivers perfect results every time.
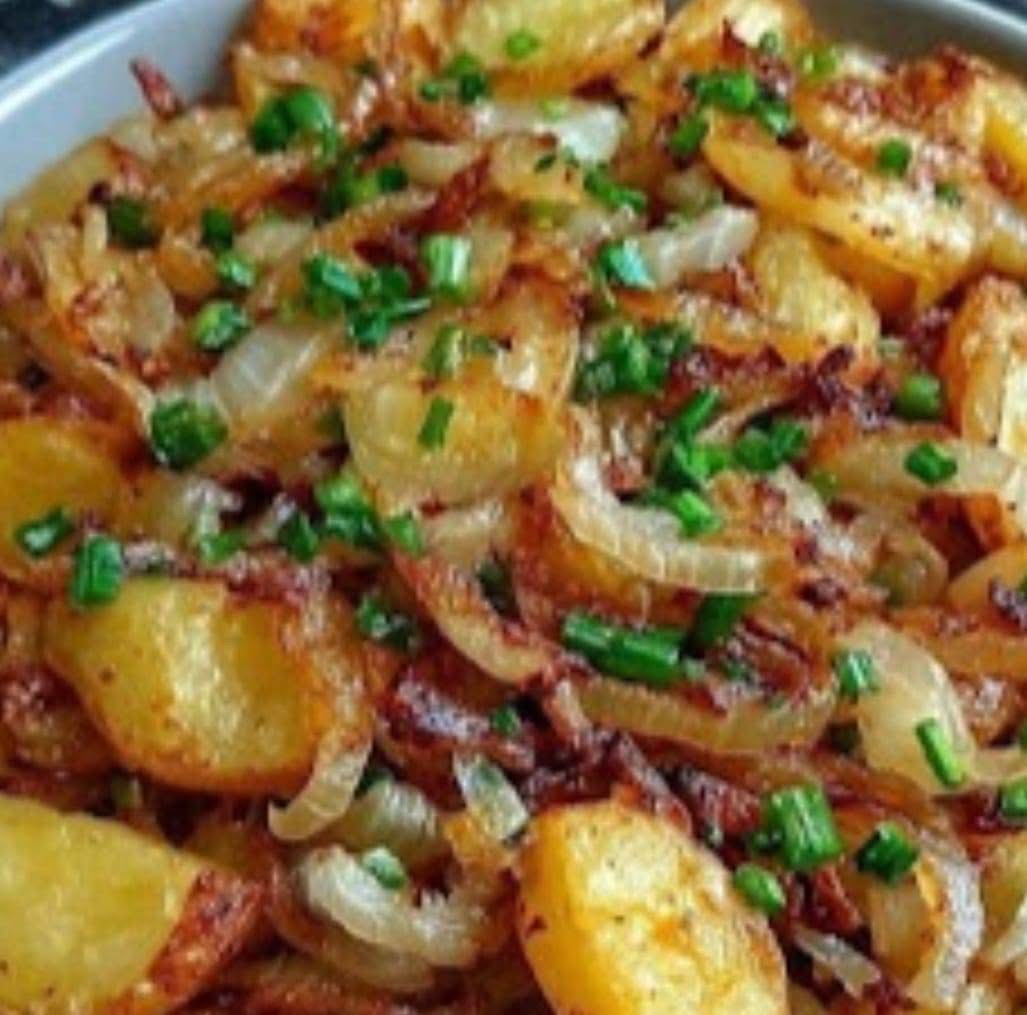
Fried Potatoes and Onions
This recipe uses a two-stage cooking process: a quick boil to ensure tender insides, followed by a pan-fry for maximum crispiness.
Prep Time: 10 minutes
Cook Time: 25 minutes
Yields: 4 servings as a side dish
Ingredients
· 2 lbs Russet or Yukon Gold potatoes (about 4 medium)
· 1 large yellow or sweet onion, thinly sliced
· 3 tablespoons olive oil, vegetable oil, or bacon grease
· 2 tablespoons unsalted butter
· 1 teaspoon paprika (optional, for color and flavor)
· Salt and freshly ground black pepper to taste
· 1 tablespoon fresh chopped parsley or chives for garnish (optional)
Instructions
Step 1: Prepare the Potatoes
- Scrub the potatoes clean. You can peel them or leave the skins on for a more rustic texture.
- Cut the potatoes into ½-inch thick slices, then cut the slices into ½-inch thick sticks (like home fries). Try to keep them uniform in size for even cooking.
- Optional Par-boil (Highly Recommended for Crispiness):
· Place the potato sticks in a pot and cover with cold water. Add a generous pinch of salt.
· Bring to a boil and cook for 5-7 minutes. They should be just fork-tender but not falling apart.
· Drain thoroughly in a colander and let them sit for a minute to steam dry.
Step 2: Cook the Onions
- While the potatoes are draining, heat the oil and 1 tablespoon of butter in a large, heavy-bottomed skillet (cast iron is ideal) over medium heat.
- Add the sliced onions and cook, stirring occasionally, for 5-7 minutes until they are softened and starting to turn golden.
- Remove the onions from the skillet and set them aside in a bowl.
Step 3: Fry the Potatoes
- Increase the heat to medium-high. Add the remaining 1 tablespoon of butter to the skillet.
- Add the par-boiled (or raw) potatoes to the hot skillet in a single layer. Spread them out so they have room to brown. Don’t stir them for the first 5-7 minutes! This is the secret to a good crust.
- Season the potatoes with salt, pepper, and paprika (if using).
- After a crust has formed on the bottom, flip and stir the potatoes. Continue cooking, stirring every 4-5 minutes, for about 15-20 minutes total, until they are golden brown and crispy on all sides.
Step 4: Combine and Finish
- When the potatoes are crispy, add the cooked onions back into the skillet.
- Toss everything together and cook for another 2-3 minutes until the onions are heated through.
- Taste and adjust seasoning with more salt and pepper if needed.
Step 5: Serve
- Transfer to a serving dish and garnish with fresh parsley or chives.
- Serve immediately while hot and crispy!
Chef’s Notes & Tips for Success
· The Par-Boil Secret: Par-boiling is the best way to ensure a fluffy interior and a crispy exterior without burning the outside before the inside is cooked. It’s a game-changer!
· Dry Potatoes are Key: Whether you par-boil or use raw potatoes, make sure they are as dry as possible before adding them to the hot oil. Pat them dry with a clean kitchen towel or paper towels.
· Don’t Crowd the Pan: Overcrowding the skillet will steam the potatoes instead of frying them. If necessary, cook in two batches.
· Cast Iron is Best: A cast-iron skillet holds and distributes heat evenly, which is perfect for achieving an all-over crispy crust.
· Additions and Variations:
· With Bacon: Cook 4-6 slices of chopped bacon first. Remove the bacon and use the rendered fat to cook the onions and potatoes. Stir the crispy bacon back in at the end.
· With Bell Peppers: Add 1 sliced bell pepper (any color) to the skillet when you cook the onions.
· Garlic Lovers: Add 2-3 minced garlic cloves during the last 2 minutes of cooking to avoid burning.
· Using Raw Potatoes: If you skip the par-boil, the cooking time will be longer (30-40 minutes). Keep the heat at medium to prevent the outside from burning before the inside is tender.
Enjoy this simple, delicious, and timeless side dish