Of course! Homemade Chocolate Covered Peanut Butter Patties are a fantastic project for any candy lover. They taste just like the famous brand (like Reese’s), but with the superior flavor of your own chosen ingredients. They’re surprisingly simple to make.
Here’s a classic, no-bake recipe that yields perfectly sweet, salty, and crunchy delights.
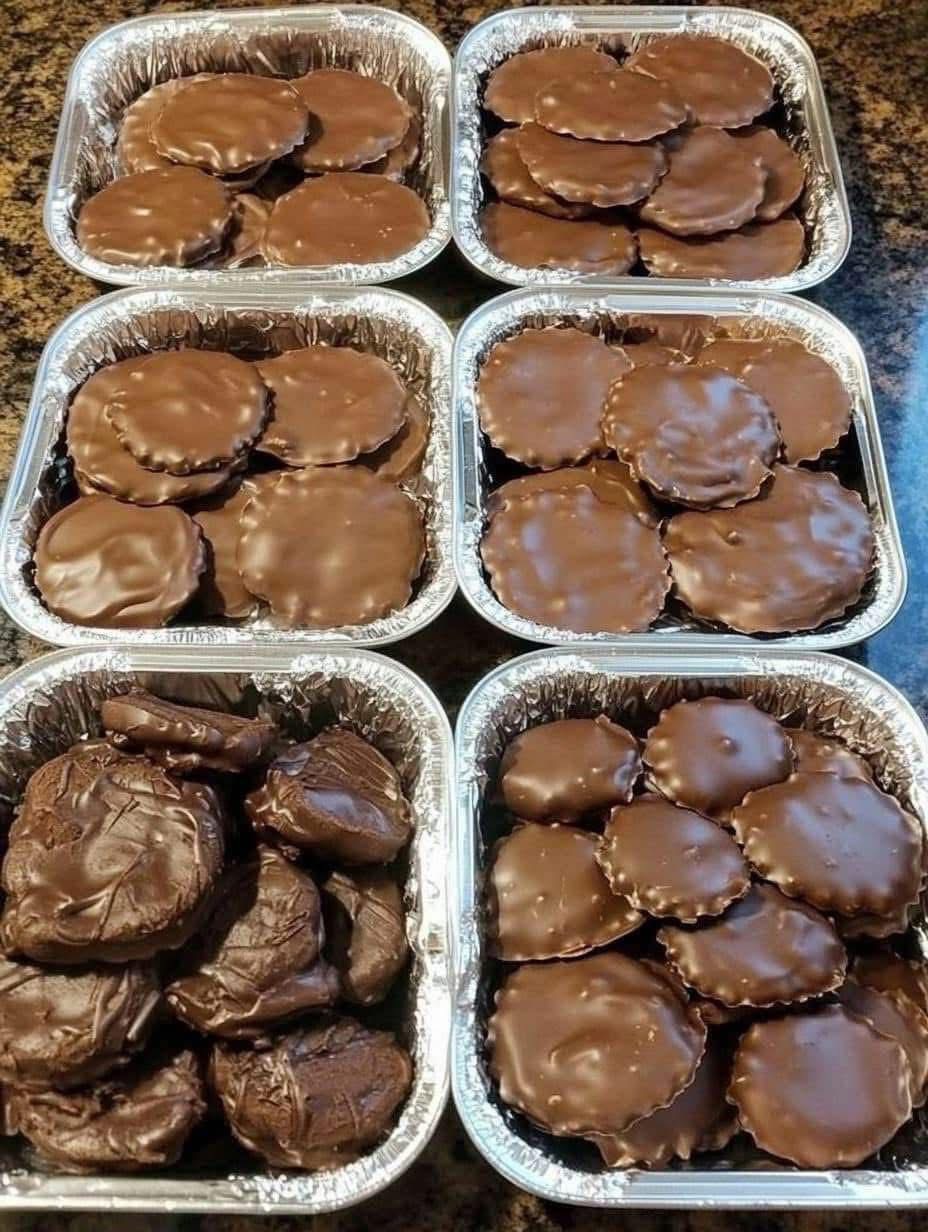
Homemade Chocolate Covered Peanut Butter Patties
This recipe uses a peanut butter filling that’s firm enough to hold its shape but melts in your mouth, all enrobed in a crisp chocolate shell.
Prep Time: 45 minutes
Setting Time: 1 hour
Yields: About 24-30 patties
Ingredients
For the Peanut Butter Filling:
· 1 cup creamy peanut butter (not natural/oily)
· 6 tablespoons unsalted butter, softened
· 1 ½ cups powdered sugar
· ¼ teaspoon salt (use ½ tsp if peanut butter is unsalted)
· ⅓ cup crushed graham cracker crumbs (about 2-3 full sheets)
· 1 teaspoon vanilla extract
For the Chocolate Coating:
· 12 ounces (about 2 cups) semi-sweet or dark chocolate chips
· 1 tablespoon coconut oil or shortening (optional, for a smoother, shinier shell)
Optional Garnish:
· Flaky sea salt for sprinkling
Instructions
Step 1: Make the Peanut Butter Filling
- Cream Base: In a medium bowl, use an electric mixer or a sturdy spoon to beat the softened butter and peanut butter together until smooth and completely combined.
- Add Dry Ingredients: Gradually add the powdered sugar and salt, mixing on low speed until incorporated. It will be crumbly at first.
- Finish the Filling: Add the graham cracker crumbs and vanilla extract. Mix until a thick, pliable dough forms. If it seems too dry to hold together, you can add a teaspoon of milk or more peanut butter. If it’s too sticky, add a bit more powdered sugar.
Step 2: Form the Patties
- Line a baking sheet with parchment or wax paper.
- Scoop out about 1 tablespoon of the peanut butter mixture. Roll it into a ball and then flatten it into a disc, about ½-inch thick and 1.5 inches in diameter. A small, flat-bottomed glass or measuring spoon can help flatten them evenly.
- Place the formed patties on the prepared baking sheet.
- Once all patties are formed, place the entire baking sheet in the freezer for at least 30 minutes. This is a crucial step—it firms them up and prevents them from falling apart when you dip them in the chocolate.
Step 3: Coat in Chocolate
- Melt Chocolate: Create a double boiler by placing a heatproof bowl over a pot of gently simmering water (ensure the bottom of the bowl doesn’t touch the water). Add the chocolate chips and coconut oil/shortening. Stir frequently until completely melted and smooth. Alternatively, you can melt them in the microwave in 30-second bursts, stirring well each time.
- Dip the Patties: Remove a few peanut butter patties from the freezer at a time. Using a fork or a dipping tool, submerge each patty in the melted chocolate, ensuring it’s fully covered.
- Drain Excess: Lift the patty out, let the excess chocolate drip off, and then gently slide it back onto the parchment-lined baking sheet.
- Garnish: If desired, immediately sprinkle the top with a tiny pinch of flaky sea salt before the chocolate sets.
Step 4: Set the Chocolate
- Once all patties are dipped, place the baking sheet back in the refrigerator for at least 30 minutes to allow the chocolate to fully set and harden.
Step 5: Serve and Store
- Once set, your homemade peanut butter patties are ready to enjoy!
- Store them in an airtight container in the refrigerator for up to 2 weeks. They can also be frozen for up to 3 months.
Chef’s Notes & Tips for Success
· Peanut Butter is Key: For the best texture and to avoid separation, use a standard commercial creamy peanut butter like Jif or Skippy, not a natural or “stir-only” variety.
· The Freezing Step is Non-Negotiable: A firm, cold center is the secret to a smooth, easy dipping process. If the centers are soft, they can melt or break in the warm chocolate.
· Graham Cracker Crunch: The graham cracker crumbs are the “secret ingredient” that provides the classic texture. Don’t skip them! You can buy pre-crushed crumbs or pulse whole sheets in a food processor or zip-top bag.
· Dipping Tools: A fork works well, but a specialty dipping tool or even a simple toothpick can make the process cleaner.
· Troubleshooting Chocolate: If your chocolate is too thick for dipping, add a bit more coconut oil (1/2 teaspoon at a time) to thin it. If it starts to set up in the bowl while you’re working, gently re-warm it.
· Flavor Variations:
· Crunchy Peanut Butter: Use crunchy peanut butter and/or add 2-3 tablespoons of finely chopped salted peanuts to the filling.
· Milk Chocolate: Use milk chocolate chips for a sweeter coating.
· Inside-Out: For a fun twist, roll the peanut butter balls in crushed graham crackers or peanuts instead of dipping them in chocolate.
Enjoy your delicious, homemade candy creations! They make wonderful gifts and are sure to impress.