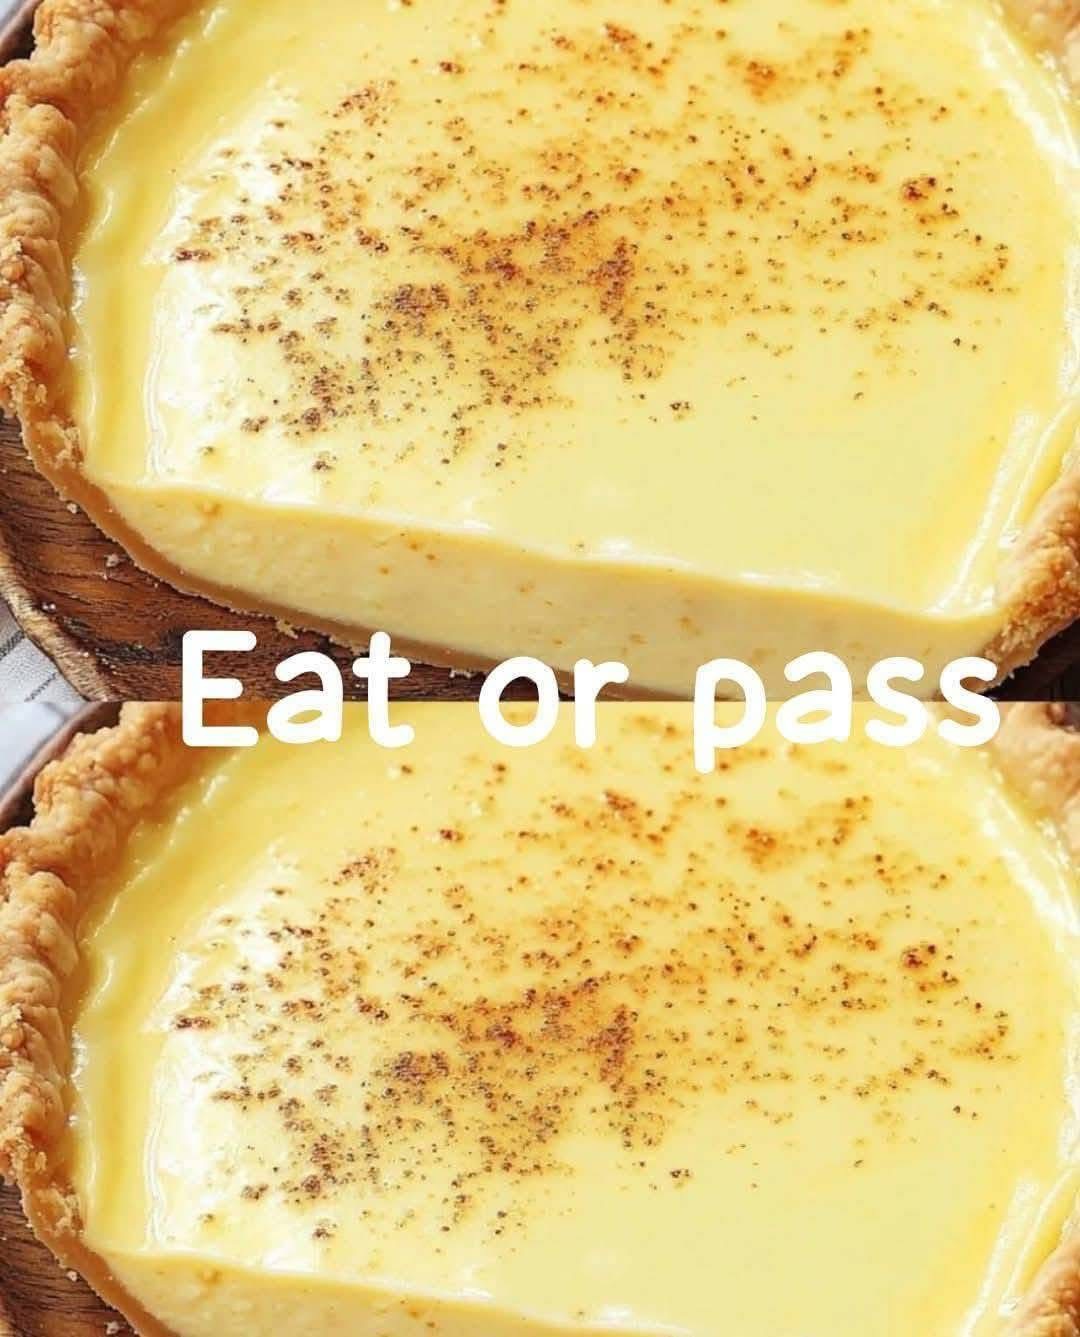
Of course! The Old-Fashioned Custard Pie is a testament to simple, pure flavors. It’s a humble, creamy, and incredibly comforting dessert with a rich history. Unlike a custard tart, this pie is often made without a top crust and has a delicate, quivering texture that is simply divine.
Here is a classic, tried-and-true recipe.
Old-Fashioned Custard Pie
This pie is all about technique. The goal is a smooth, creamy, and delicate custard without any bubbles or weeping.
Prep Time: 20 minutes
Cook Time: 50-60 minutes
Cooling Time: 3 hours (minimum)
Yields: One 9-inch pie (8 servings)
Ingredients
For the Crust:
· 1 unbaked 9-inch pie crust, homemade or store-bought
· (If making from scratch: 1 ¼ cups flour, ½ tsp salt, ½ cup cold butter, 3-4 tbsp ice water)
For the Custard Filling:
· 4 large eggs
· ½ cup granulated sugar
· ¼ teaspoon salt
· 1 teaspoon vanilla extract
· A pinch of freshly grated nutmeg (plus more for dusting)
· 2 ½ cups whole milk, warmed (see instructions)
· Ground nutmeg for topping
Instructions
Step 1: Prepare the Pie Crust
- Preheat your oven to 400°F (200°C).
- If using a homemade crust, fit it into a 9-inch pie plate and crimp the edges. Prick the bottom and sides all over with a fork (this is called “docking”).
- Optional, but highly recommended for a crisp crust: Line the unbaked crust with parchment paper or foil and fill with pie weights, dried beans, or rice.
- Blind Bake: Bake for 12-15 minutes until the edges are lightly golden. Remove the parchment and weights. If the bottom puffs up, gently press it down with a spoon.
- Remove from the oven and reduce the oven temperature to 325°F (165°C). Let the crust cool slightly while you make the filling.
Step 2: Make the Custard Filling
- Warm the Milk: Gently heat the milk in a saucepan until it is just warm to the touch (about 120°F/50°C). Do not boil. This helps the custard bake more evenly and smoothly.
- Whisk Eggs and Sugar: In a large bowl, whisk the eggs gently until just combined. You do not want to create a lot of foam.
- Combine Ingredients: Whisk in the sugar, salt, vanilla extract, and a pinch of nutmeg until smooth.
- Temper the Milk: This is the key to a smooth custard. Very slowly, while whisking constantly, pour the warm milk into the egg mixture. Whisk until everything is just combined.
Step 3: Strain and Fill
- Crucial Step: Place a fine-mesh strainer over a large liquid measuring cup or bowl. Pour the custard mixture through the strainer. This catches any curdled egg bits and ensures a perfectly silky texture.
- Skim off any tiny bubbles from the surface with a spoon.
- Carefully pour the strained custard into the pre-baked pie shell.
Step 4: Bake Low and Slow
- Grate a light, even layer of fresh nutmeg over the entire surface of the custard.
- Carefully place the pie on the center oven rack. To prevent the edges from over-browning, you can use a pie crust shield or make one from strips of aluminum foil.
- Bake at 325°F (165°C) for 45-55 minutes. The pie is done when the edges are set but the center still has a slight jiggle—like Jell-O—when you gently shake the pan. A knife inserted near the center should come out clean.
- Do not overbake! The custard will continue to set as it cools.
Step 5: Cool Completely
- Place the pie on a wire cooling rack and let it cool to room temperature. This will take at least 2-3 hours.
- Once at room temperature, refrigerate for at least 2-3 more hours (or overnight) before slicing. This allows the custard to fully set and makes for clean slices.
Chef’s Notes & Tips for Success
· The Secret to No Bubbles: Whisk gently, strain the custard, and skim off bubbles. This is what gives you that classic, smooth, old-fashioned surface.
· Why Warm Milk? Adding cold milk to the eggs can cause the fat in the crust to solidify, leading to a soggy bottom. Warm milk helps the custard start cooking immediately and promotes even setting.
· Preventing a Soggy Bottom: Pre-baking (blind baking) the crust is non-negotiable for a custard pie. It creates a barrier that the liquid custard can’t soak through.
· The “Jiggle” Test: Trust the jiggle test more than the clock. An overbaked custard will become watery and rubbery as it releases its moisture (this is called “weeping”).
· Flavor Variations:
· Buttermilk Pie: Substitute 1 ¼ cups of buttermilk for an equal amount of the whole milk for a delightful tang.
· Coconut Custard Pie: Add 1 cup of sweetened shredded coconut to the filling.
· Storage: Keep the pie covered in the refrigerator for up to 3 days.
Serve this timeless classic cool, all on its own, to truly appreciate its delicate and comforting flavor. Enjoy!