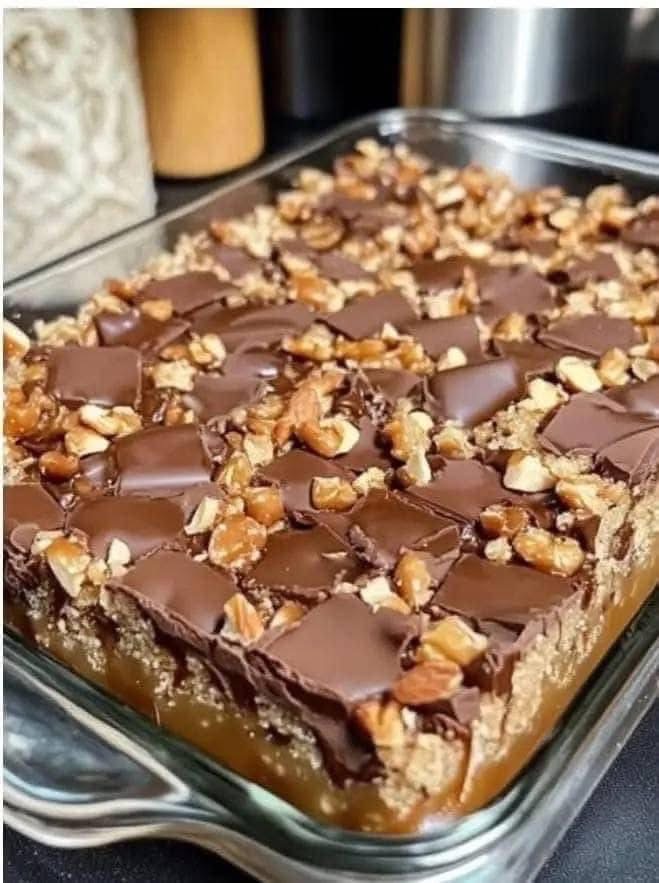
Of course! Caramel Chocolate Crunch Bars are the ultimate no-bake treat for anyone who loves the combination of sweet, salty, crunchy, and chocolatey. They’re incredibly easy to make and always a crowd-pleaser.
Think of them as a superior, homemade version of a certain famous candy bar, but with your own personal touch.
Here’s a classic and highly reliable recipe.
Why You’ll Love These Bars
· No-Bake: No oven required! They set in the refrigerator or freezer.
· Easy & Fast: Ready in under 20 minutes of active time.
· Customizable: Use your favorite kind of chocolate or add-ins.
· Perfect Texture: A crispy, salty base with a gooey caramel layer and a smooth chocolate shell.
Classic Caramel Chocolate Crunch Bars Recipe
This is the foundational recipe using simple ingredients.
Yields: One 9×9-inch pan (about 16-20 bars)
Prep time: 15 minutes
Setting time: 2 hours (or 30 minutes in the freezer)
Ingredients:
For the Crunch Base:
· 6 cups (150g) crispy rice cereal (like Rice Krispies)
· 1 cup (230g) unsalted butter
· 1 cup (200g) packed light brown sugar
· 1/3 cup (80ml) light corn syrup (or honey)
· 1/4 teaspoon salt (use 1/2 tsp if you used unsalted butter)
For the Topping:
· 1 (11 oz or 312g) bag of milk chocolate chips (about 1 3/4 cups)
· Or a combination of semi-sweet and milk chocolate
· Flaky sea salt (like Maldon), for sprinkling (optional, but highly recommended)
Instructions:
- Prepare the Pan: Line a 9×9-inch square baking pan with parchment paper, leaving an overhang on two sides. This will make it easy to lift the whole block out later. Lightly grease the parchment.
- Make the Crunch Base: Place the crispy rice cereal in a large heatproof bowl and set aside.
- Create the Caramel: In a medium saucepan over medium heat, combine the butter, brown sugar, corn syrup, and salt. Cook, stirring constantly, until the butter has melted and the mixture comes to a gentle boil. Let it boil for 1 minute, still stirring.
- Combine: Immediately pour the hot caramel mixture over the cereal in the bowl. Working quickly, use a spatula or wooden spoon to stir until every piece of cereal is thoroughly coated.
- Press into Pan: Transfer the mixture to your prepared pan. Use the back of a greased spatula or a sheet of parchment paper to press it down very firmly and evenly. This is key to getting bars that hold together!
- Melt the Chocolate: While the base is setting, place the chocolate chips in a microwave-safe bowl. Heat in 20-second intervals, stirring well each time, until the chocolate is completely smooth and melted. You can also use a double boiler.
- Add the Topping: Pour the melted chocolate over the pressed cereal base. Use an offset spatula or the back of a spoon to spread it into an even layer.
- Sprinkle with Salt: Immediately sprinkle the top with a little flaky sea salt. This enhances all the flavors beautifully.
- Chill to Set: Place the pan in the refrigerator for at least 2 hours, or in the freezer for about 30 minutes, until the chocolate is completely firm.
- Slice and Serve: Use the parchment paper overhang to lift the entire block out of the pan. Place it on a cutting board and slice into bars or squares with a sharp knife.
5 Delicious Variations & Twists
- “Twix” Style: Add a layer of melted caramel (from a bag of soft caramels melted with a splash of cream) between the cereal base and the chocolate layer.
- Peanut Butter Lover’s: Swirl 1/4 cup of peanut butter into the melted chocolate before pouring it over the base. You can also use 3 cups cereal and 2 cups salted peanuts for the base.
- Coconut Dream: Mix 1 cup of toasted coconut into the cereal base.
- Pretzel Crunch: Replace 2 cups of the rice cereal with broken-up pretzel pieces for a fantastic sweet & salty combo.
- Dark Chocolate & Almond: Use dark chocolate chips for the topping and mix 1 cup of toasted, sliced almonds into the base.
Serving & Storing Tips
· Storage: Store these bars in an airtight container in the refrigerator for up to 2 weeks. They can be kept at room temperature for a few days if your kitchen is cool, but the chocolate may become soft.
· Freezing: They freeze exceptionally well! Layer them between parchment paper in an airtight container and freeze for up to 3 months. Thaw in the fridge or for a few minutes at room temperature.
· Serving: Serve them straight from the fridge for a satisfying snap, or let them sit out for 10 minutes for a slightly softer, chewier bite.
Pro Tips for the Best Bars
· Press FIRMLY: The single most important step is pressing the cereal mixture into the pan as firmly as possible. This prevents the bars from crumbling when you cut them.
· Don’t Burn the Caramel: Watch the caramel mixture carefully during its 1-minute boil. Overcooking it will make the bars hard and chewy.
· Use a Good Knife: For clean cuts, use a large, sharp chef’s knife. You can wipe the blade clean between cuts for a pristine look.
· Customize Your Chocolate: The quality of chocolate matters. Use a brand you enjoy eating on its own for the best results.
Enjoy making and eating these incredibly addictive treats
